Please click on the thumbnails to see the large images or videos
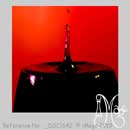
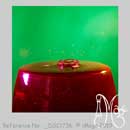
My pictures were taken in front of a piece of fluorescent coated A4 paper, however any colour paper will do, even white.
The drops were made by putting a plug of kitchen towel into a funnel, then packing it down to control the rate of dripping when you add water to the funnel. Alternatively a small plastic bag can be used. Partly fill with water, tie off the open end, then use a fine needle or sharp pin to puncture a very small hole in the bag. Do check that the bag hasn't got a hole already! Next, suspend your drip making device above a large bowl or tray to catch the splashes.
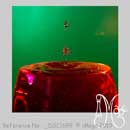
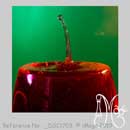
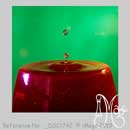
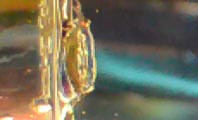
My target for the drops was a clear wine glass. This should give enough height to clear the top of the bowl or tray used to catch the splashes.
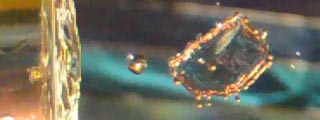
I used two flashguns, one on a remote (off camera) lead, the other with an optical trigger. I put pieces of coloured cellophane in front of the flash tubes (sweet wrappers attached with selotape), and angled the flashes back towards the camera from opposite sides of the glass that I used to drop the water into. The flashguns were set on manual, not TTL or Auto, and the power reduced to 1/32 of full power or less.
Arrange the camera to be about the same level as the surface of the water in the glass. A tripod is most helpful for this. Next note where the drops are hitting the surface, and ask someone to hold a pencil just touching the surface where the drops hit. Focus the camera on this point, or slightly above the surface of the water. A macro lens is best for this, but it should have a long focal length, at least twice that of your normal lens, or use the longest setting on your 'Standard' zoom to allow you to get far enough away from the subject to get a reasonable depth of field.
If you have one, a remote shutter release will avoid shaking or moving the camera when you release the shutter.
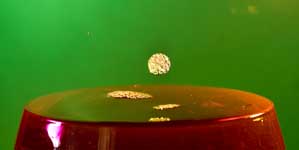
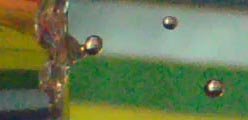
Now the tricky bit. I found that letting the drops fall from between 9 and 18 inches (22 to 45cm.) was enough to allow me to capture my images. Depending on how quick your reactions are, adjust the height of the drop maker so that you capture the instant just after the drop hits the surface. Take the time to review your images every 6 to 10 flashes. If necessary, adjust the height of your drop maker to allow you to capture different stages of the splash formation.
Do NOT take a large number of flash pictures in very quick succession. Limit yourself to 6, otherwise you may overheat your batteries and damage your flashgun. Nikon suggests that at 1/16 power, after 6 exposures in rapid succession you should let the flash cool down for 10 MINUTES!!
More information can be found 'on-line', just Google* 'photographing dripping water' (* other search engines are available) and browse the results, or watch the 'u-tube' videos.
A Drip On The Side .... MOVIES!!
On investigation I found that the Nikon 1 cameras will do "slow-motion", taking pictures at 400 or 1200 fps, then playing them back at the normal speed of 30 fps. After experimenting a little with this I found that it was almost impossible for me to synchronise the release of the drop with the (maximum) 3 second burst of filming, in order to catch the entire splash and drop formation.
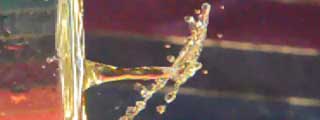
After playing around for some time, I decided on continuous light (bright sunlight from the window) and a reflective background of coloured metallic wrapping paper. I rearranged my paper plug in my funnel to allow a much more rapid rate of dripping. Having done this I just activated the camera and caught the small clips. After viewing the results I juggled around with the backgrounds and height of camera and have produced a series of short videos.
As the video format is landscape 8 wide to 3 high, I had to rotate the camera 90 degrees in order to frame a reasonable shot, so all the videos appear sideways!